
The Ligna platform offers a robust theme engine that simplifies the process of importing and customizing themes. This guide provides insights into how to seamlessly import themes into Ligna's theme engine, focusing on HTML structure, CSS, and the use of root variables.
Understanding the Basics
For those new to HTML and JavaScript, the initial steps in theme import might seem daunting. However, the process is straightforward once you grasp the basics. Advanced users will appreciate the layout and potential for monetization through theme customization.
Choosing the Right Theme
When selecting a theme from sources like ThemeForest, it's essential to avoid WordPress themes to simplify the process. HTML versions of themes are recommended. For instance, bootstrap-based themes are preferable for their ease of use and clean structure. The chosen theme should have a straightforward HTML hierarchy to avoid complications during asset management.
Asset Management and Import
The key to successful theme import lies in proper asset management. Creating a dedicated folder for the theme and ensuring a clean folder structure are crucial steps. Avoid spaces in file names, as this can lead to issues in a Linux-based system like Ligna. Dragging the entire asset folder into Ligna's asset manager is the first step in importing the theme.
Mapping Assets
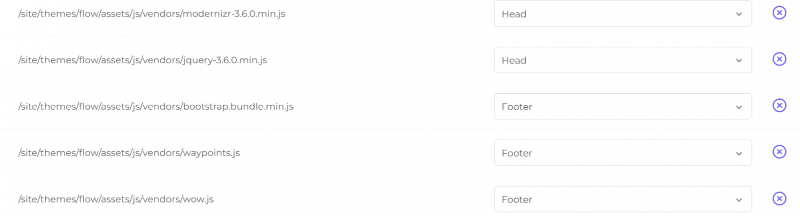
Once assets are uploaded, mapping them correctly is vital. The CSS and JavaScript files should be added in the order they appear in the theme. This step can be tedious, but it ensures that the theme functions correctly in Ligna's environment. Pay special attention to font paths and root variables in the CSS files, as incorrect paths can lead to rendering issues.
Advanced Customization: Root Variables and CSS Manipulation
The process of importing themes into Ligna's theme engine goes beyond basic asset management. A crucial aspect involves understanding and using root variables in CSS for advanced customization.
Root Variables in CSS
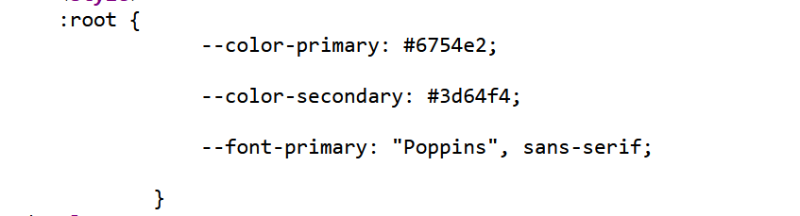
Root variables are powerful tools in CSS that enable theme-wide changes with minimal effort. They are generally defined at the top of the CSS file and can be used to control color schemes, fonts, and other design elements throughout the theme. When importing a theme into Ligna, it’s essential to identify and modify these root variables to ensure flexibility and ease of customization for end users.
Color Schemes and Consistency
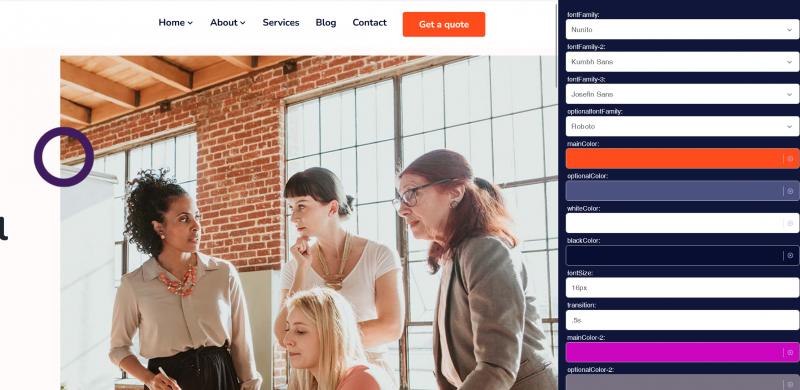
One common challenge when importing themes is dealing with predefined color schemes that may not align with your desired aesthetic. To tackle this, you can identify the primary and secondary colors used in the theme and replace them with root variables. This replacement allows users to change these colors easily within the Ligna theme builder, ensuring that the theme can adapt to different branding requirements.
Utilizing Browser Tools for Color Identification
A practical method to identify color codes within a theme is by using the browser's 'Inspect Element' tool. This tool allows you to hover over sections of the theme to reveal CSS properties, including color codes. By extracting these codes, you can accurately set up your root variables in Ligna to correspond with the theme's color scheme.

Updating CSS Files and Variables
Once the primary and secondary colors (or other elements) are identified, you can replace their instances in the CSS file with the corresponding root variables you've set up in Ligna. This step ensures that when a user selects a color in the Ligna builder, it dynamically updates across all instances where the variable is used in the theme.
The Power of CSS Variables
The use of CSS variables in theme customization offers immense power and flexibility. It simplifies the process of making global changes across a theme, enhancing the user experience for both the developer and the end user. With root variables, you can ensure that your theme is not just visually appealing but also versatile and adaptable to various user needs.
Dealing with Specific Style Elements
After setting up the primary and secondary color variables, it’s essential to inspect each element of the theme to ensure consistency across various components. This may involve identifying unique color hues used in specific sections of the theme and deciding whether to align them with the primary or secondary colors or to introduce new variables.
Inspecting Elements for Accurate Styling
Utilizing the browser's 'Inspect Element' feature is crucial in this process. It helps identify specific CSS attributes like color codes and font styles applied to different elements. For instance, if a banner's color doesn't match the expected primary or secondary color, it can be inspected to understand its specific CSS attribute and color code.
Standardizing Colors Across the Theme
If certain elements have slightly different hues than the main color themes, it’s often a good idea to standardize these by aligning them with the primary or secondary colors. This can be done by replacing these unique hues in the CSS file with the corresponding primary or secondary color variables. This ensures a consistent look across the website.
Handling Fonts and Customization
In addition to colors, fonts are a significant aspect of a theme. If the theme uses a specific font from an external source like Google Fonts, it can be included as a variable. This allows users to change the font easily within the Ligna builder. It's important to ensure that the font variables are correctly set up in the CSS file to reflect these changes across the theme.
Setting Up Navigation and Internal Page Links
After establishing the primary and secondary color schemes, and ensuring fonts are properly set, the next crucial step is configuring the navigation. This involves setting up correct and functional links within the theme. It’s vital to use absolute paths (like /homepage1, /about, etc.) rather than relative paths to avoid navigation issues.
Global Blocks for Header Styles
For themes with multiple header styles, create global blocks for each style. This allows users to easily apply different header styles to various pages within their site. For instance, if a theme has five different header styles, you should create five internal pages, each corresponding to a different header style.
Simplifying User Experience with Pre-configured Pages
Instead of including an overwhelming number of pre-configured pages, focus on the essential ones like the home page, about page, and contact page. This reduces complexity and allows users to customize and add new pages as needed. Set up the essential pages with functional navigation links and proper naming conventions to simplify the user experience.
Customizing and Testing Each Page
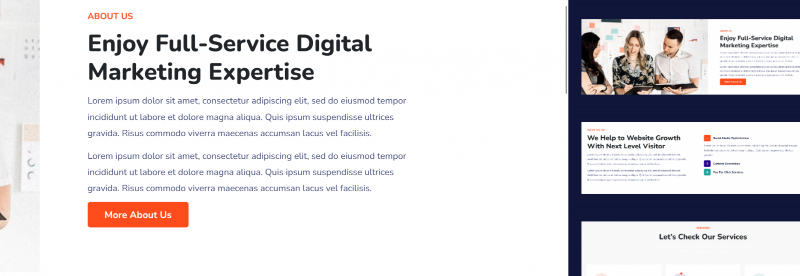
For each page and style, go through the HTML and CSS to ensure everything is in order. Replace placeholder texts and images, and ensure that all interactive elements like buttons and links are functional. Test each page for responsiveness and visual appeal.
Simplifying the Theme for User Convenience
The goal of this process is to create a theme that is not only visually appealing but also user-friendly. By simplifying the theme’s customization options, users can easily adapt the theme to their specific needs without requiring extensive technical knowledge.
Creating Internal Pages and Blocks: After finalizing the home page, continue to create internal pages and corresponding header and footer for each, along with additional global blocks for various headers.
Building Content Blocks: Methodically work through the site, creating content blocks for each section. This involves taking screenshots of each section, naming them (e.g., Banner, Logos, About), and then adding these blocks into the system. This step is crucial for building a comprehensive repository of elements that users can easily drag and drop to customize their sites.
Testing and Troubleshooting: It's important to test each block to ensure that all elements are editable and functioning correctly in the builder. This step might reveal the need for minor adjustments, such as adding proper HTML tags to ensure editability.
Setting Up Blog Widget: Configure the blog widget using loop data technology for dynamic content display. This allows users to customize the blog section easily and align it with the theme’s design.
Access and Visibility Control: Decide whether the theme should be available to the entire ecosystem or restricted to certain users. This can be done by setting access permissions in the theme settings.
Thumbnail Creation: Create and upload a thumbnail for the theme. This gives users a preview of the theme’s appearance.
Finalization and Release: Once all pages and blocks are created, and access permissions are set, the theme is ready for release. Users can then leverage this theme for building or customizing their websites.
Troubleshooting and Finalizing the Theme
During the testing phase, troubleshoot any issues that arise, such as fonts not changing or images not displaying correctly. This might involve re-uploading CSS files, adjusting font variables, and ensuring all assets are correctly mapped.
Preparing for Release
Before releasing the theme, double-check all elements for consistency and functionality. Ensure that the theme is intuitive for users to customize and navigate. The goal is to provide a theme that is not just visually appealing but also user-friendly and adaptable to different needs.
Finally Done...start monetizing!
Creating a custom theme in Ligna's Theme Engine involves a detailed process of setting up pages, blocks, global elements, and testing. This enables users with varying levels of expertise to effectively use and customize the theme for their specific needs, enhancing their website building experience.
Learn How To Use This Inside Of Ligna